To prepare your home for roof replacement, start one week early by clearing the driveway and yard, removing wall hangings near upper-floor ceilings, and securing items in the attic. On installation day, move vehicles to the street, keep children and pets indoors, and plan for steady noise from 7 AM to 4 PM. Most Seattle-area roof replacements take 1 to 3 days depending on roof size, pitch, and weather conditions.
The good news is that the heavy lifting is your contractor’s job. Permits, dumpsters, material delivery, and cleanup are all handled by the crew. Your job is to clear the work area, protect your interior, and stay out of the danger zone. Here is exactly what to do, broken down by timeline.
One Week Before Your Roof Replacement
The week before is when you set the foundation for a smooth project. None of these steps are urgent on their own, but skipping them causes day-of headaches.
Confirm the Schedule and Logistics
Call your contractor to reconfirm the start date, expected duration, and material delivery timing. In Seattle, most roofing crews start at 7:00 AM (the earliest allowed under city noise ordinances) and wrap by 4:00 PM. Material is usually delivered the morning of day one or the afternoon before.
Clear Your Driveway and Staging Area
The crew needs space for their truck, the dumpster, and a material staging zone. The dumpster is the largest item, typically 12 to 20 yards, and sits on your driveway or street for the duration of the project. Move all vehicles to the street or arrange parking with a neighbor.
Trim Overhanging Branches
Branches over the roof create three problems: they drop debris on the new roof, they damage shingles in wind, and they block access for the crew. Trim or have an arborist cut back any branch within 6 to 8 feet of the roof surface. This is also a good time to inspect for dead limbs that should come down.
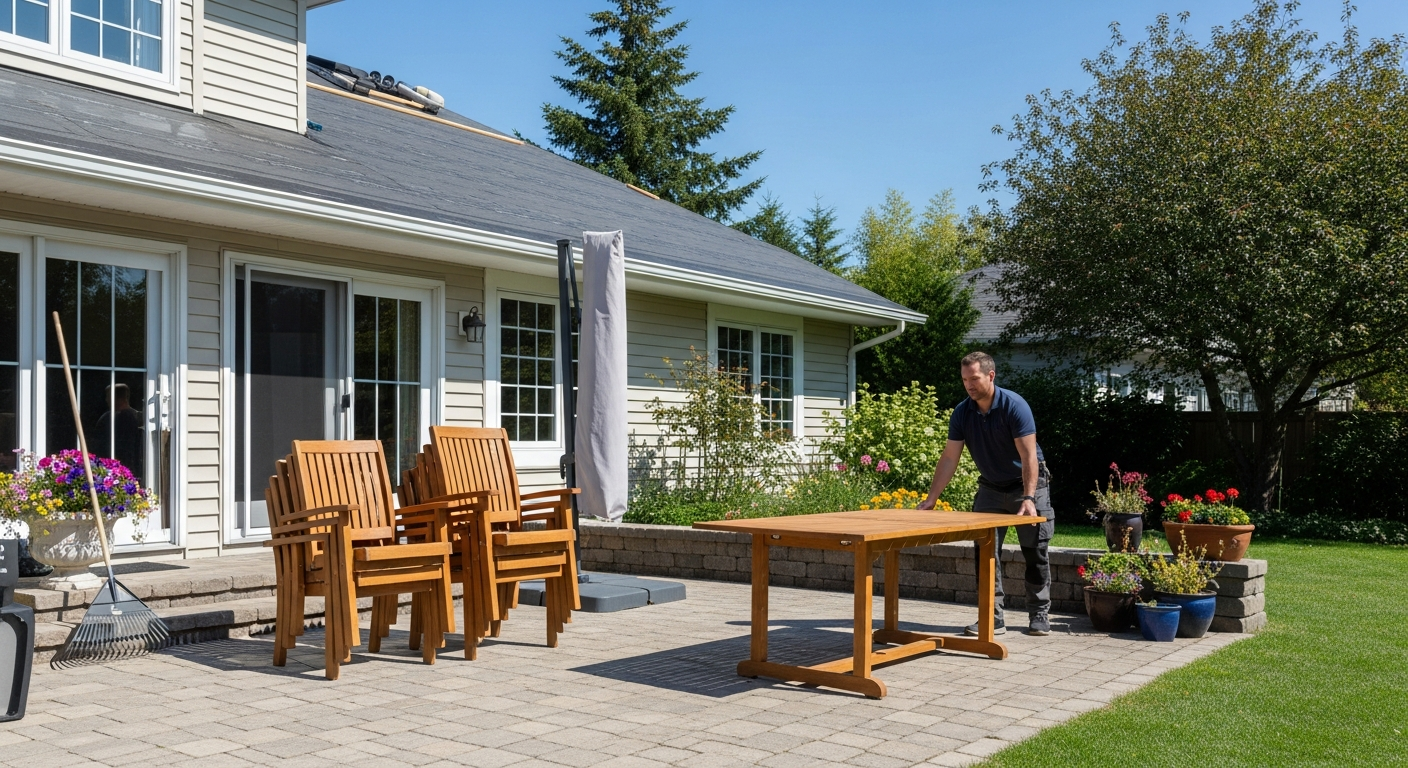
Move Patio Furniture, Grills, and Planters
Anything within 15 feet of the house should move to the back of the yard or into a shed. Falling debris from tear-off can damage furniture, scratch grills, or knock over planters. Glass-top tables and ceramic pots are especially vulnerable.
Notify Your Neighbors
A simple text or door knock prevents complaints and goodwill problems. Tell them the dates, expected work hours (7 AM to 4 PM), and that there will be a dumpster on your driveway. If your house shares a property line closely, mention that some debris may briefly cross the line during tear-off and that the crew will clean it up.
Three Days Before
This is when you protect your interior. Tear-off creates more vibration than people expect, especially on older homes with plaster ceilings.
Remove Wall Hangings on Upper Floors
Pictures, mirrors, and shelves on upper-floor walls can rattle off their hooks during tear-off. Take down anything fragile or heavy that hangs near the ceiling on the top floor. On single-story homes, do the same for any walls that share airspace with the attic above.
Secure Items on Open Shelves
Knickknacks, vases, and breakables on open shelves can tip over from sustained vibration. Lay them flat or pack them in a box for the project duration. Cabinet doors with magnetic catches usually hold fine.
Cover Attic Belongings
Tear-off shakes loose decades of dust between roof rafters. That dust falls into the attic space below. If you store anything in your attic (holiday decor, old furniture, boxes of family photos), cover it with drop cloths or plastic sheeting. Move anything irreplaceable to a closet downstairs.
Tighten Loose Fixtures
Walk through the upper floor and check ceiling fans, chandeliers, and pendant lights. If any of them wobble when you nudge the bracket, tighten the mounting screws. Loose fixtures are the most common interior casualty of roof replacements.
The Day Before
Day-before tasks are short but critical. Skipping them means a delayed start on installation day.
Move All Vehicles
Park on the street or at a neighbor’s. The driveway needs to be clear by 7:00 AM the next morning for the crew, the dumpster, and material staging. If you live in a tight neighborhood with permit parking, plan ahead.
Clear the Final 15 Feet
Walk the perimeter of your house and remove anything still in the work zone: garden hoses, kids’ toys, bikes, lawn equipment. The crew will work overhead, and small objects below become trip hazards or get damaged by falling debris.
Mark Delicate Landscaping
If you have flower beds, ornamental shrubs, or new plantings near the foundation, place stakes or flags to identify them. The crew will lay tarps and plywood over delicate areas, but they need to know what to protect.
Set Up a Pet-Safe Room
Choose an interior room away from exterior walls (a hallway closet, an interior bathroom, or a finished basement room works well). Move food, water, beds, and any familiar items there. Plan to keep pets in this space during tear-off, or board them at daycare for the loudest days.
Charge Devices and Plan for the Workday
If you work from home, plan accordingly. Tear-off makes phone calls difficult. Either schedule meetings off-site, work from a coffee shop or library, or invest in noise-canceling headphones for one to two days. Most homeowners just take the day off or run errands.
Day of Installation: What to Expect
Knowing what happens hour by hour reduces anxiety and helps you plan around the project.
Arrival and Setup (7:00 to 8:00 AM)
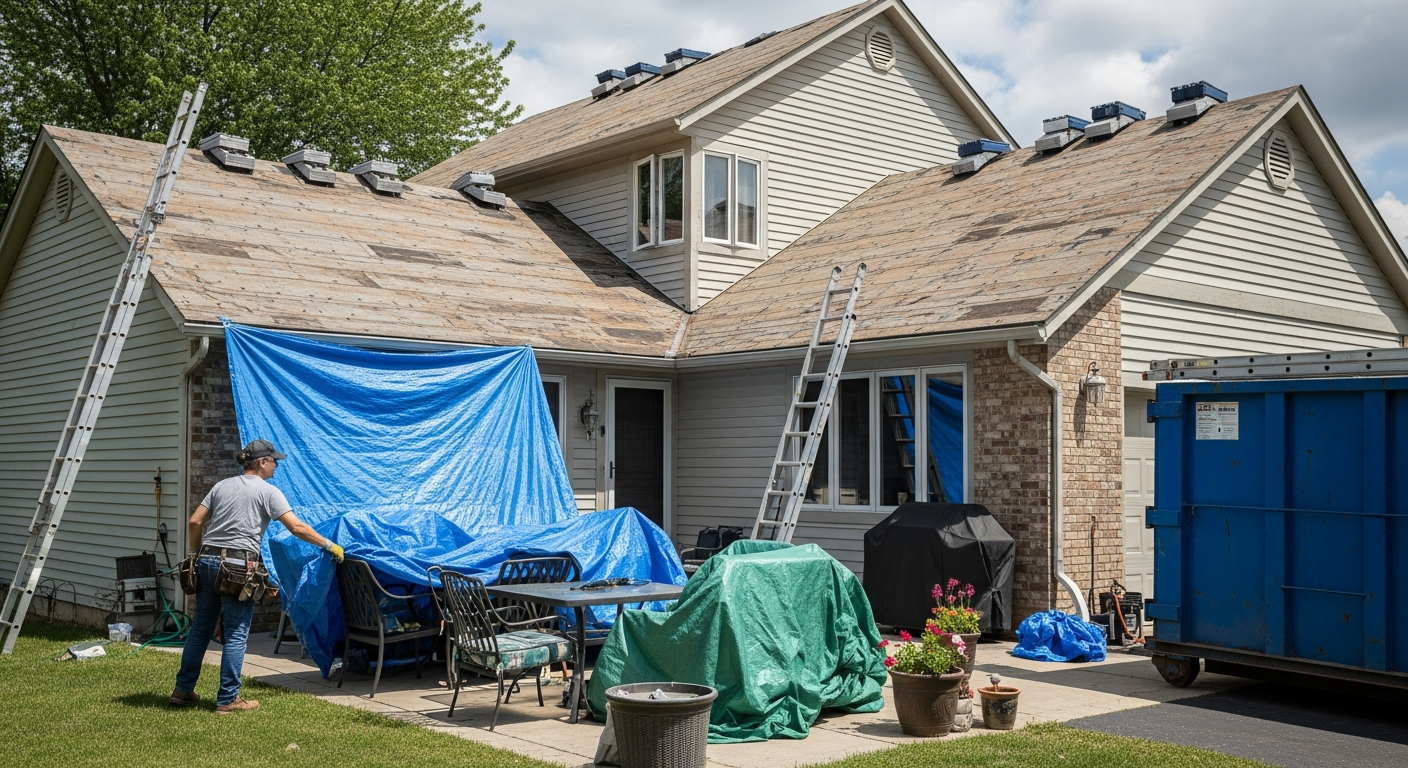
The crew arrives, parks the dump truck, and begins setting up: tarps along the perimeter, plywood over delicate landscaping, ladders against the eaves, and safety harnesses anchored to the roof. The foreman will introduce themselves and walk you through the day’s plan.
Tear-Off (8:00 AM to Noon)
This is the loudest part of the project. Crews use shovels and pry bars to lift old shingles, underlayment, and nails. Debris falls onto tarps below. On a 2,000 to 2,500 sq ft home, tear-off takes 3 to 5 hours.
Expect significant vibration through the roof structure. This is when wall hangings rattle and ceiling fans wobble. The noise is comparable to a loud lawn mower running continuously above your head.
Decking Inspection and Repairs (Noon)
Once the old roofing is off, the crew inspects the plywood decking for rot or water damage. Any damaged sheets get replaced before installation begins. In Seattle, expect a few sheets of decking replacement on most homes over 25 years old.
Underlayment and Installation (1:00 PM to 4:00 PM)
The crew rolls out synthetic underlayment, installs ice and water shield in valleys and around penetrations, and begins laying shingles or panels from the bottom up. This phase is much quieter than tear-off, mostly the sound of nail guns.
On a one-day project, installation finishes by 4:00 PM. On a two- or three-day project, the crew tarps the exposed areas before leaving and resumes the next morning.
End-of-Day Cleanup
Before leaving, the crew runs a magnetic sweep across your driveway, lawn, and perimeter to pick up loose nails. Debris is loaded into the dumpster. Tools are removed from the roof. Tarps are folded.
Pet and Child Safety
The work zone is hazardous for hours after the crew leaves. Take these precautions seriously.
During Tear-Off
Keep dogs indoors or at daycare. The constant noise and vibration is genuinely stressful for animals, and many will pace, bark, or hide for hours. Cats should be confined to an interior room well away from exterior walls. Birds should be moved to a quiet interior space if possible.
Children should not play in the yard during tear-off. Falling debris is unpredictable, and even a small wood chip from twenty feet up has enough force to cause an injury. Plan a playdate, a park visit, or indoor activities until end-of-day cleanup is complete.
After the Crew Leaves
Even with a thorough magnetic sweep, the occasional nail gets missed. Walk your yard before letting pets out for at least three days after the project ends. Pay extra attention to grassy areas, mulch beds, and anywhere the crew staged materials.
If you have a fenced yard, check that all gates are closed before letting pets out. Crews access the yard during the workday and occasionally leave a gate ajar.
PNW-Specific Preparation
Seattle’s climate adds factors that national prep guides do not address.
What If It Rains Mid-Project
This is the question every Seattle homeowner asks. The answer: your contractor tarps the open sections at the end of each workday and during any unexpected weather. Modern synthetic underlayment is also water-resistant, providing a secondary barrier even before shingles go on.
A reputable Seattle roofer monitors the 10-day forecast leading up to your project and reschedules tear-off if a major rain event is imminent. Replacement projects are not started in a downpour, period. If a sudden shower arrives mid-tear-off, work stops, tarps go on, and the crew waits it out.
Light drizzle does not stop work. Heavy rain or sustained showers do. Your home is never left exposed overnight or during meaningful precipitation.
Best Months for Roof Replacement in Seattle
May through October is peak roofing season in the Pacific Northwest, with June through September being ideal. April and October are workable but more weather-dependent. November through March is doable but slower and more weather-disrupted.
If your project falls in shoulder season (April or October), build in a one- to three-day buffer for weather delays. Spring rain and fall storms can push start dates by a few days.
K Single Corp’s Rain Policy
We monitor weather daily during active projects and communicate proactively with homeowners. If we need to pause work for weather, we tarp the roof, secure the site, and reschedule. We never leave a roof open overnight or in active rain.

What Your Contractor Handles
You do not need to worry about any of this. Your contractor manages it as part of the project.
- Permits. K Single Corp pulls the building permit for your municipality (Seattle, Bellevue, Kirkland, etc.) and coordinates inspections.
- Dumpster rental and placement. Sized to your project, delivered before tear-off, picked up after the final cleanup.
- Material delivery and staging. Shingles, underlayment, flashing, and accessories arrive when needed and are staged for efficient installation.
- Debris cleanup. Old roofing material, packaging, and scrap go in the dumpster. Magnetic sweeps remove loose nails.
- Final inspection. A senior project manager walks the completed roof with you, points out craftsmanship details, and answers any questions.
- Warranty registration. Your manufacturer warranty (typically 25 to 50 years on Malarkey shingles) is registered in your name as part of project closeout.
Your Pre-Roof Replacement Prep Checklist
Get a Free Roof Replacement Estimate
If you are not yet scheduled but are considering a roof replacement, K Single Corp offers free estimates for homeowners across King, Snohomish, and Pierce counties. Our project managers walk you through the timeline, material options, financing, and what to expect during installation. There is no pressure and no upselling.
Schedule your free estimate or call (206) 659-4349 to talk through your project. For homeowners ready to move forward, see our residential roofing service overview or run cost estimates on our roofing calculator.
For more on what to expect during the actual installation, read our companion guide on what to expect during a roof installation. And if you have not yet scheduled an inspection, start with what to expect during a roof inspection.